hyprsnap is a unified, script-based screenshot utility designed specifically for the Wayland/Hyprland environment.
It acts as a comprehensive wrapper around existing Wayland tools, providing a seamless workflow. Instead of remembering multiple keybindings or command-line flags for different screenshot modes (window, region, monitor), hyprsnap allows you to press a single key and handle everything through a unified GUI menu.
- Unified Workflow: Trigger one command for all use cases. No need for separate bindings for regions, windows, or full-screen captures.
- Screen Freezing: The screen is frozen immediately upon launch (using
hyprpicker), allowing you to capture transient menus, popups, and video frames easily. - Post-Capture Actions: extensive options after selecting a region:
- Smart Selection: Easily switch between capturing a specific region, a window, the desktop (without panels), a single screen, or all monitors.
- Zero Configuration: A minimal, functional interface with no config files required. It just works.
hyprsnap is a shell script that relies on the following tools. Ensure they are installed on your system:
- Core/UI:
rofi(Menu interface)jq(JSON parsing for hyprctl)imagemagick(Image conversion)
- Wayland Utils:
hyprpicker(Screen freezing)grim(Screenshot capture)slurp(Region selection)wl-clipboard(Clipboard management)
- Editing/Annotation:
pinta(Image editor)satty(Annotation tool)
You can install hyprsnap directly from the AUR:
yay -S hyprsnapIf you are not using Arch Linux, ensure all dependencies are installed, then simply download the script and place it in your $PATH:
chmod +x hyprsnap
sudo cp hyprsnap /usr/local/bin/To use hyprsnap with Hyprland, add the following binding to your hyprland.conf:
bind = , Print, exec, hyprsnapOnce reloaded, simply press the Print Screen (PrtSc) key to start the utility.
When you press the hotkey, the screen will instantly freeze and dim. You will be prompted to select an initial region using your mouse.
Once a region is selected, the Main Menu appears, displaying a preview of the screenshot and a list of actions.
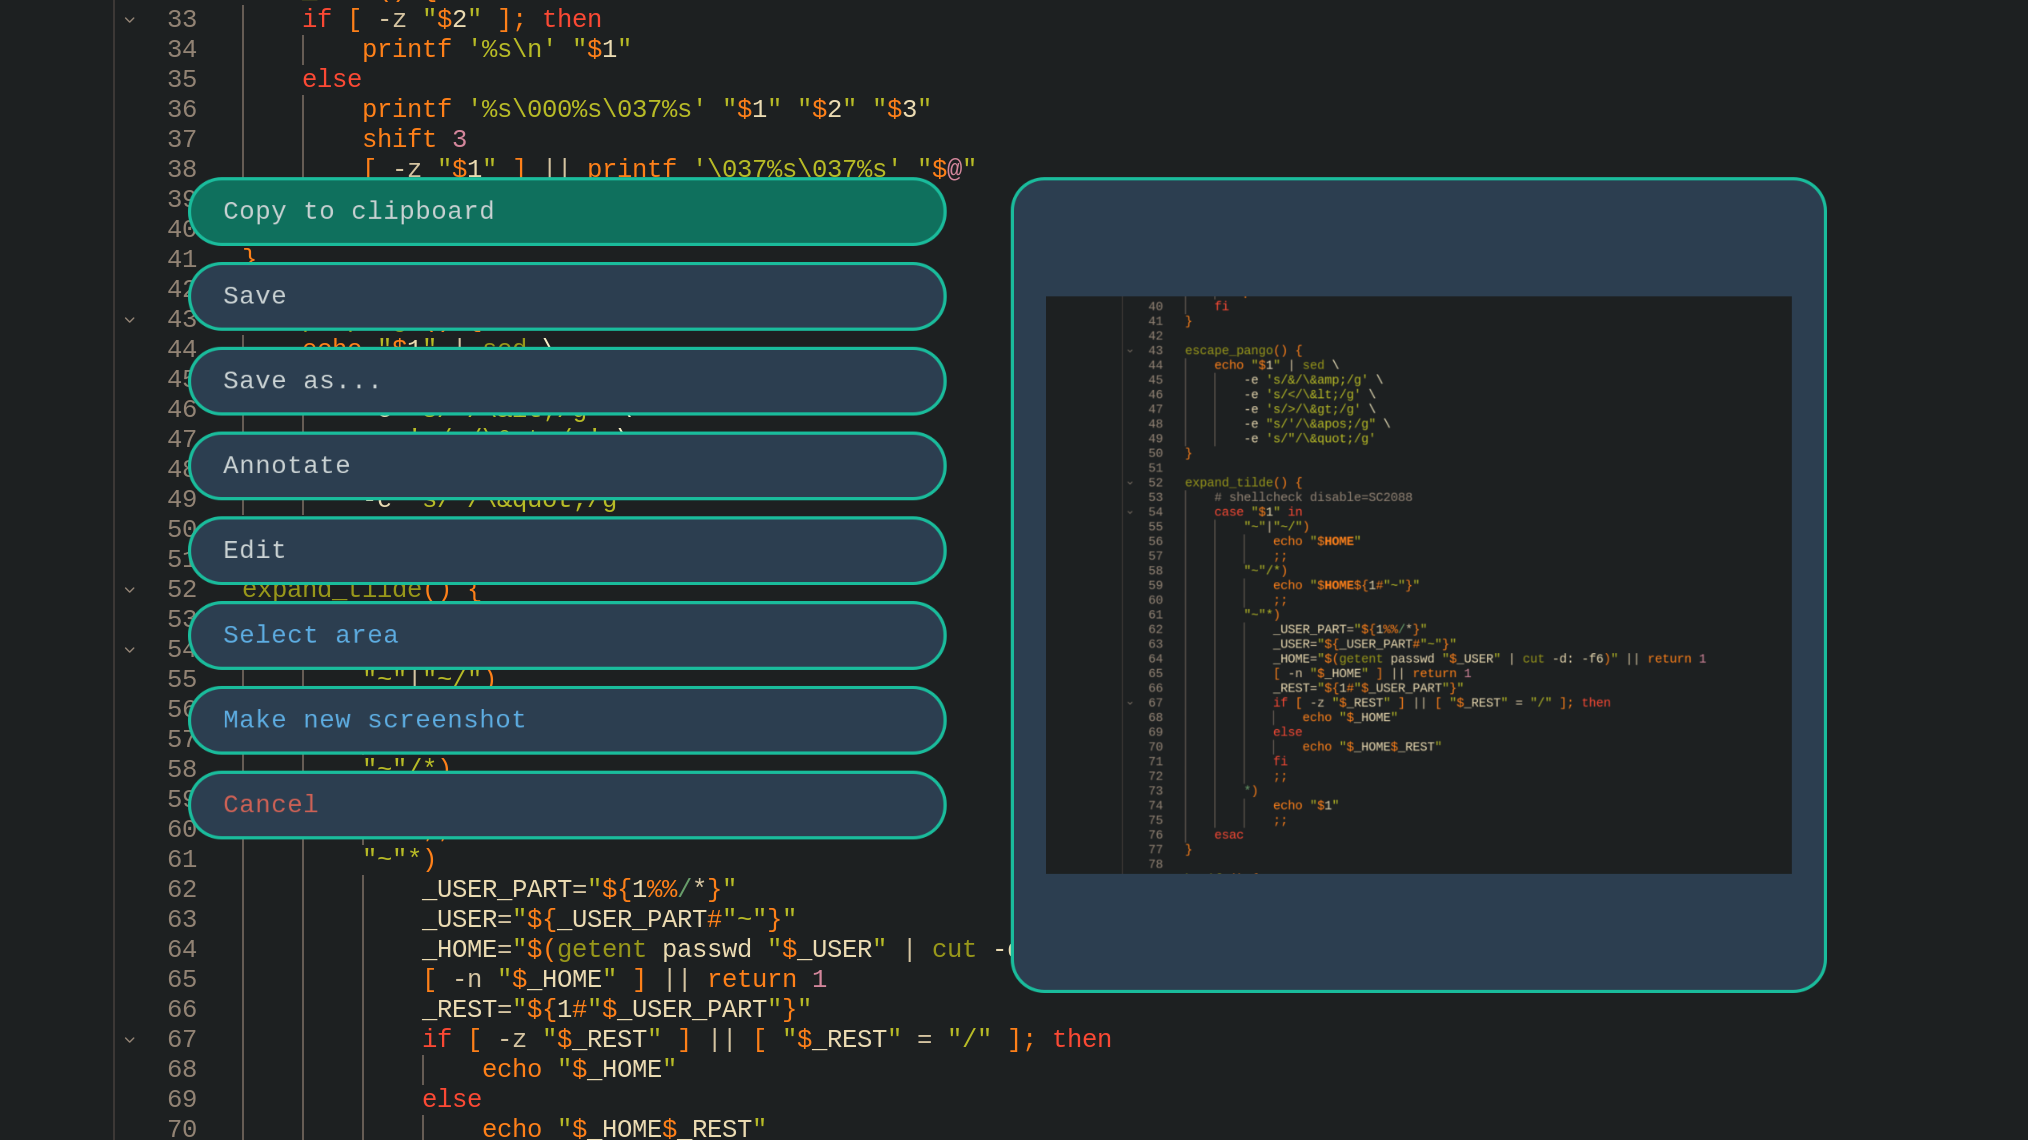
Available Actions:
- Copy to clipboard: Copies the image to your clipboard and exits.
- Save: Saves the image to
~/Pictures/Screenshots/with a timestamped filename. - Save as...: Prompts for a custom filename before saving.
- Annotate: Opens the screenshot in satty for drawing arrows, text, and blurring sensitive info.
- Edit: Opens the screenshot in pinta for advanced editing.
- Select area: Opens the sub-menu to adjust exactly what you want to capture (see below).
- Make new screenshot: Discards the current selection and lets you redraw the region.
- Cancel: Exits without doing anything.
If you choose Select area from the main menu, you can refine your capture target without restarting the tool.
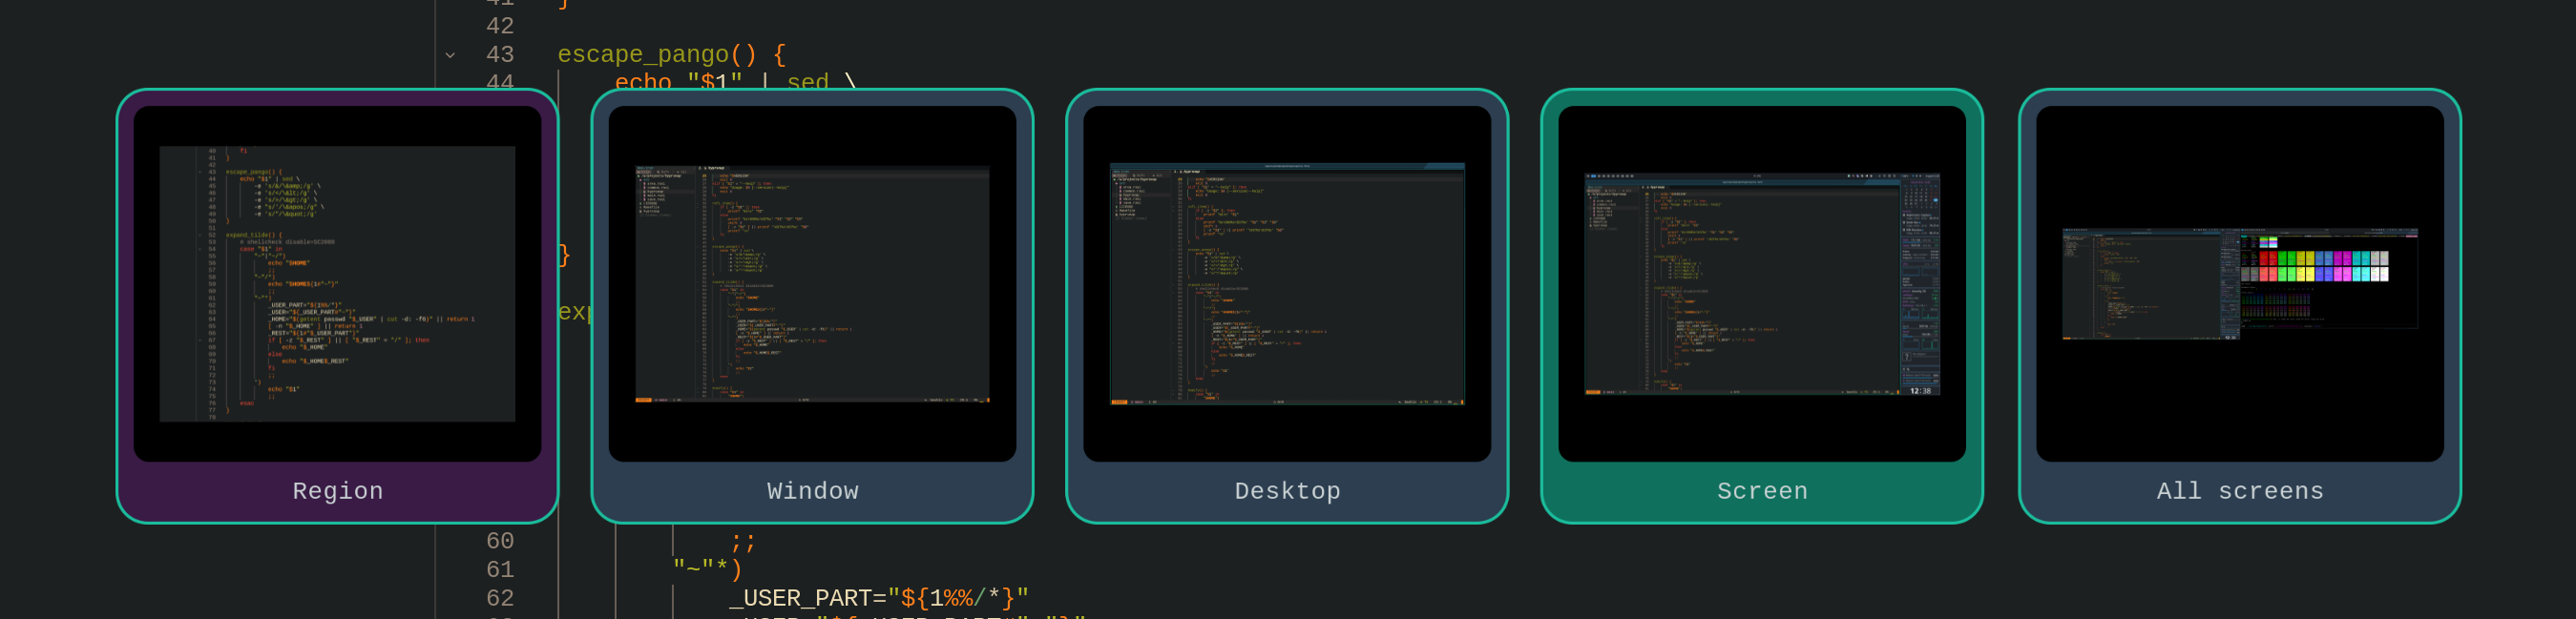
Selection Modes:
- Region: The custom rectangular area you selected.
- Window: Automatically detects the window best fitting your selection.
- Desktop: Captures the workspace background (excluding bars/panels).
- Screen: Captures the full output (including bars/panels).
- All screens: Captures the combined output of all monitors (only visible on multi-monitor setups).
When choosing Save as..., a simple input dialog allows you to name your file.
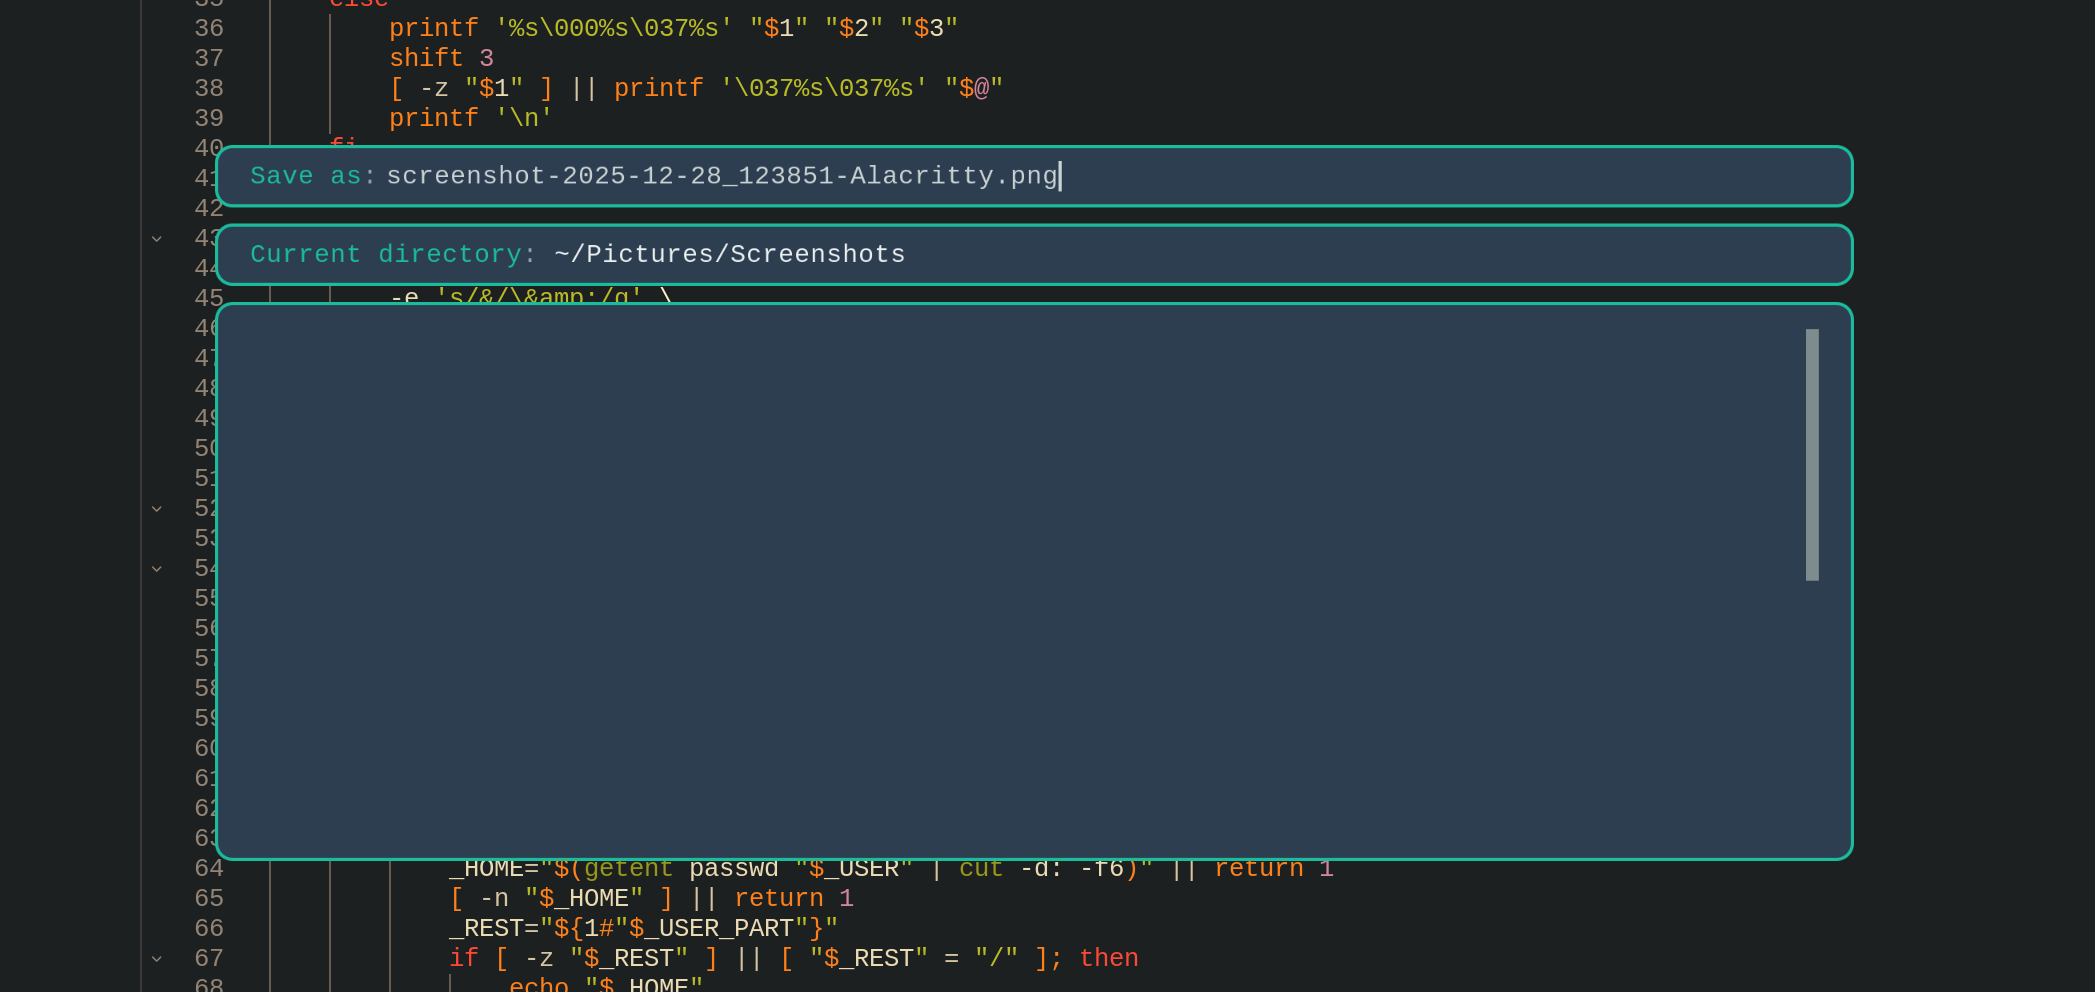
Press Enter to confirm and save the file to the default directory.
Copyright (c) 2025 Konstantin Kushnir [email protected]